It’s almost September, and even though here in Maryland we’ve still got another month of warm weather, I’m already in an autumn state of mind. Bonfires. Camping. Curling up with a movie and hot apple cider. Pie.
And that means blankets. Scarves. Shawls. Things soft and cozy. Things made by hand. But who has time to make an afghan, really? I’ve done it, but it took a lot of time and effort before there was Norah A. Babysaurus, and now? Well, things just take a little bit longer.
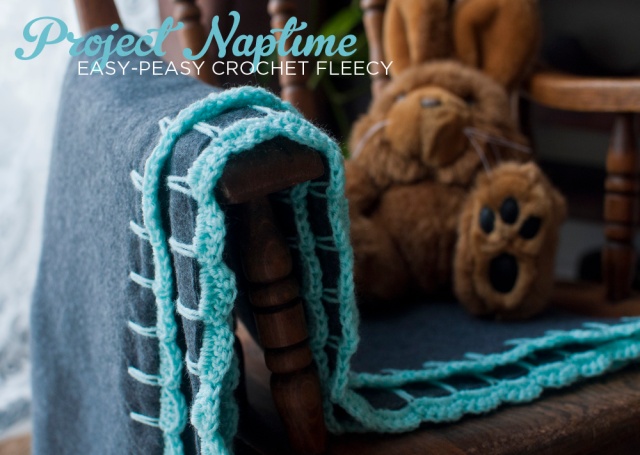
Rest assured, there is a solution: one that’s faster and (let’s face it) cheaper, and it’s called crochet-edged poly-fleece.
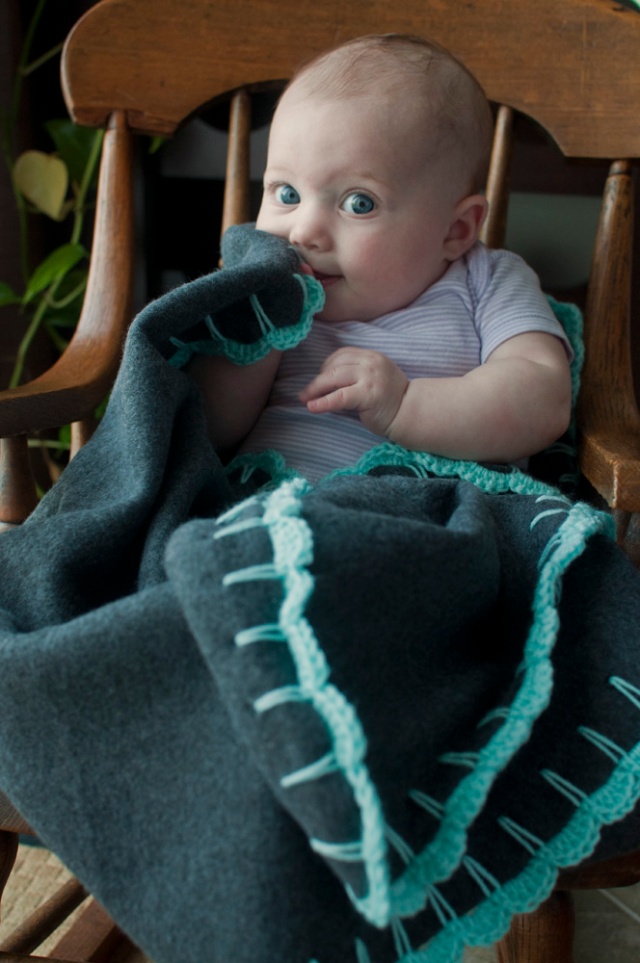
Poly-fleece is soft, cozy, and loveable. Who doesn’t love fleece?! It’s washable, and all you do is cut it down to size — no sewing required! Sometimes that’s enough. But not today. Today, we’re putting an edge on fleece: a simple crocheted edge, to be exact, which I think is just the thing to elevate a plain fleece blanket (or shawl, or scarf) to new heights of cuddliness.
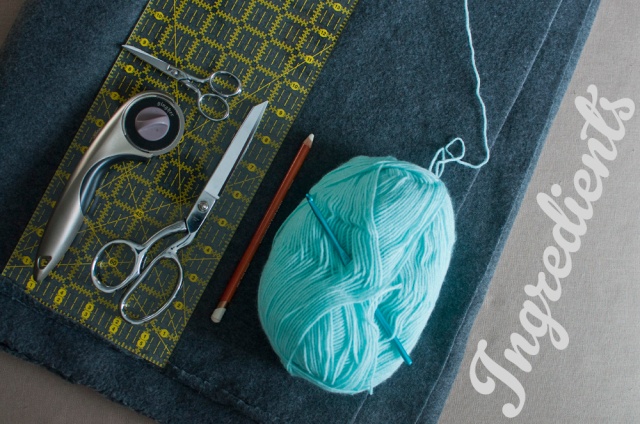
INGREDIENTS
To do this project yourself, here’s what you’ll need:
- Poly-fleece (see notes)
- Sharp scissors
- Straight edge and/or ruler
- Chalk (for dark material) or erasable fabric marker (for light material)
- Acrylic yarn, light weight (#3)
(I used something called Sensations Cuddle in Turquoise)
- Crochet hook, size H/8 (5.00 mm)
- Yarn needle
OPTIONAL:
NOTES:
- The quantity of poly-fleece and yarn you’ll need depends on the size of your project. To do a throw-sized blanket, you’ll need 2–2 1/2 yards of fleece and one 400-yard skein of yarn.
- Although I love natural fibers as much as any other yarn fanatic, I chose acrylic for this project because the blanket material is synthetic, and by using synthetic yarn, you are more likely to avoid any disappointing shrinkage or distortion that can happen in the laundry when you mix synthetic and natural fibers. (In other words, you don’t want your yarn border to shrink while your fleece material remains its original size.)
- I’ve tried to make my instructions as simple and clear as possible, but if you’ve never crocheted before or you’re having trouble following along with my written instructions, check out this free instructional series on the Lion Brand Yarn website.
- Even though there’s no hemming or sewing involved, I still like to wash the fleece before beginning.
Let’s get started!
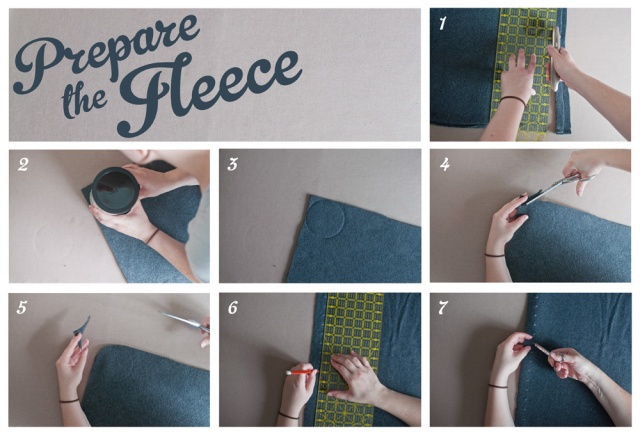
PREPARE THE FLEECE!
Trim the edges. Fold the fleece in half, and trim the open edges using a straight edge and rotary cutter or scissors [1]. Be sure not to trim the folded edge, or you’ll end up with two smaller pieces of fleece.
Round the corners. I did this by taking an oatmeal can (a mug, coffee can, or some other cylinder with a pleasing radius will do) and positioned the can so that it was just touching the edges of the fleece [2]. A firm press downward will leave a clear indentation in the fleece [3] that you can use to trim the corners [4 and 5]. I did this with the fleece still folded in half so that I only had to trim twice (two corners at once) — make sure you’re not cutting on the fold!
Measure and snip. It’s virtually impossible to poke a crochet hook through poly-fleece (I spent way too long trying), so you’ll have to use a pair of sharp scissors to snip a row of small holes all the way around the edge. I tried to eyeball it, but found in the end that it’s easier to take the time to measure and mark the holes with a ruler and chalk or washable fabric marker [6]. I made mine one inch apart, about one inch from the edge of the fleece.
Then snip a hole at each mark, just big enough to insert your crochet hook through [7]. Anything too big will allow the yarn to slide around and buckle the fabric.
SAFETY NOTE: Please be careful not to snip your fingers.
CROCHET THE BORDER!
This pattern uses single crochet, double crochet, and chain stitches.
I joined the yarn to the fleece with a single crochet stitch through one of the small holes; it doesn’t matter where you start, although I recommend that you avoid starting with a corner.
If you know how to read a crochet pattern, this is what we’ll be doing for the first round:
- Straight edge: [Sc 1, ch 3] across, until you reach a corner
- Corner: [Sc 1, ch 5] until you reach a straight edge
- Join with sl st
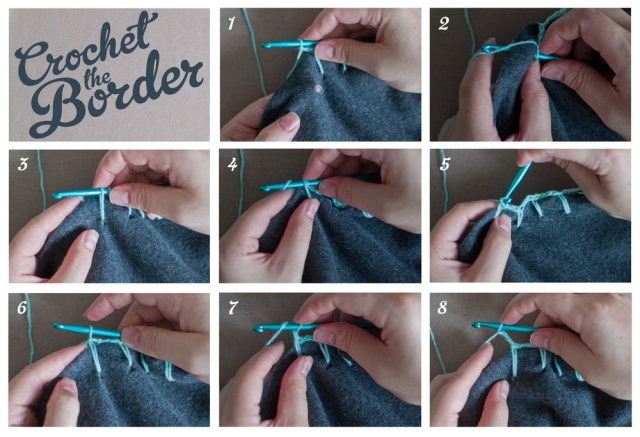
Make one single crochet stitch (sc 1). Find one of the snipped holes [1]. Insert your crochet hook from the front, and yarn over the hook by wrapping the yarn around from the back of the hook. Pull a loop of yarn back through to the front of the fleece [2] — you’ll now have two loops on your hook. Pull the second loop up so that it is as tall as the distance from the hole to the edge of the fleece; this will cause the fleece edge to bunch up, so you’ll want to flatten the fleece edge back out again to ensure the stitch is tall enough before continuing [5]. Yarn over the hook again [4] and pull the yarn-over piece through the other two loops [5].
Make three chain stitches (ch 3). You should be left with one loop on your hook again. Yarn over the hook and pull through the loop [7]. This makes one chain stitch. Repeat two more times for three chain stitches total [8].
Repeat. Continue making one single crochet in each hole, followed by three chain stitches along each side of the fleece. (sc 1, ch 3)
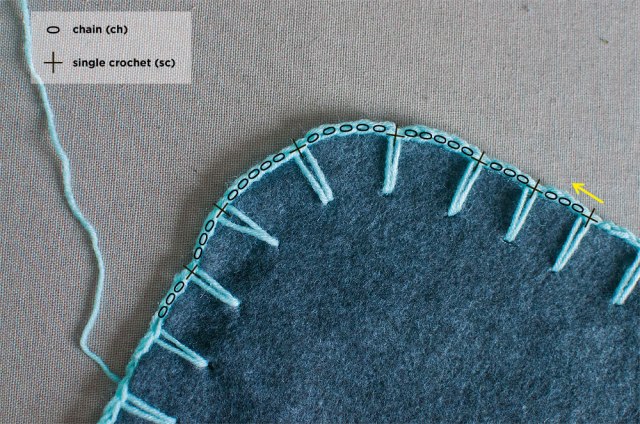
When you get to a corner, you may want to increase the number of chain stitches to five (ch 5). This is because the distance between the tops of the single crochet stitches is greater than the distance between the holes you made for the base of the stitches. (It’s like running on the outside of a track versus the inside.) If you only make three chain stitches, the corners of the fleece will curl and buckle. By adding a few more chain stitches, you’ll ensure that the corners will lay flat.
Join with a slip stitch (sl st) when you’ve come back around to the beginning. Insert your hook into the first single crochet stitch, yarn over and pull the yarn back through both the first single crochet stitch and the loop on your hook.
If you like the simple border, you can stop here and fasten off your yarn, then use the yarn needle to weave in the end. I continued with a second row to make a scalloped border.
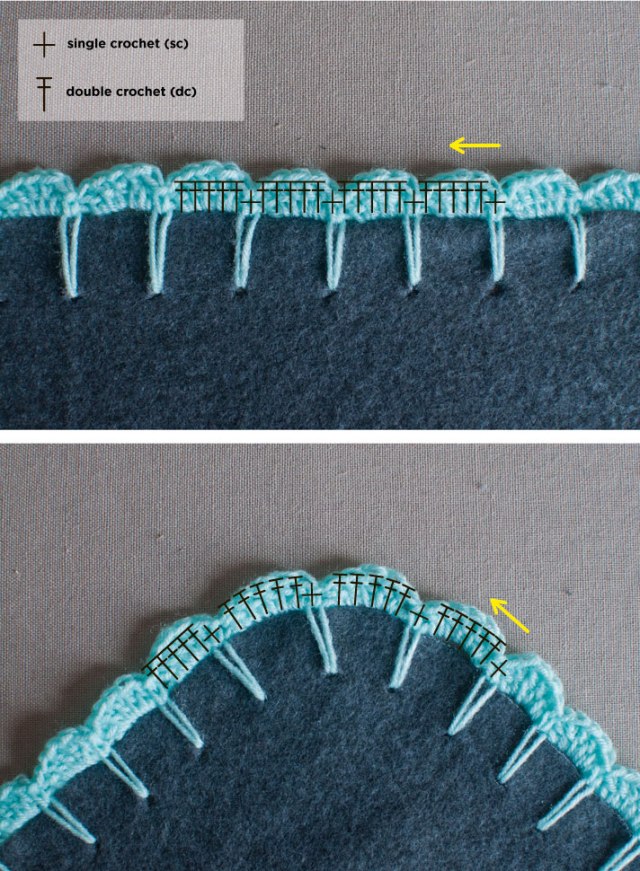
Crochet a scalloped border. If you know how to read a crochet pattern, this is what we’ll be doing for the second round:
- [Ch 1, sc 1 in sc of 1st rnd, dc 5 in ch sp] around, join with sl st
Make one chain stitch followed by a single crochet into the first single crochet of the first row. (ch 1, sc 1)
Make five double crochet stitches into the chain space (dc 5 in ch space) — so you’ll be forming your stitches around the chains. Yarn over the hook once, then insert your hook from front to back in the space between the chain and the fleece. Yarn over again and pull the hook back through, so that you have three loops on your hook. Yarn over again and pull through two loops; then yarn over again and pull through the remaining two to complete one double crochet stitch. Repeat four more times for five double crochet stitches total.
Repeat. Continue making one single crochet into each single crochet stitch of the first round, and five double crochet stitches into each chain space, until you reach the beginning of the second round. Join with a slip stitch to the first single crochet of the second round.
Fasten off and use the yarn needle to weave in the end. Then cuddle up!
